Let’s kick off this mini-series with stock photo tip number 1.
To sell your first photo on a stock agency, you need it to look professional.
Whatever the camera you took the photo with, a dslr, a drone or a phone, with a good colour editing, it will be good enough to be on sale online.
My advice here could be surprising : don’t spend too much time on editing !
Photos on stock agencies usually have a natural look with vibrant colours, and that’s it. Photos with too much editing, fake colours, vignetting or other effects are often refused to be sold online by stock agencies.
Put yourself in the shoes of the person who will buy your photo : they will want a photo already well edited with nice colours so they don’t have to spend time editing it themselves. If they want to be creative with effects and special colours, they could edit it themselves later on, but if your photo is already edited too much, they couldn’t modify it.
Below I’ll explain quickly how to edit a photo in Lightroom, so that they can be approved by stock agencies.
I use Lightroom as it’s the best photo editing software, but any other software have similar features.
Lightroom basic editing
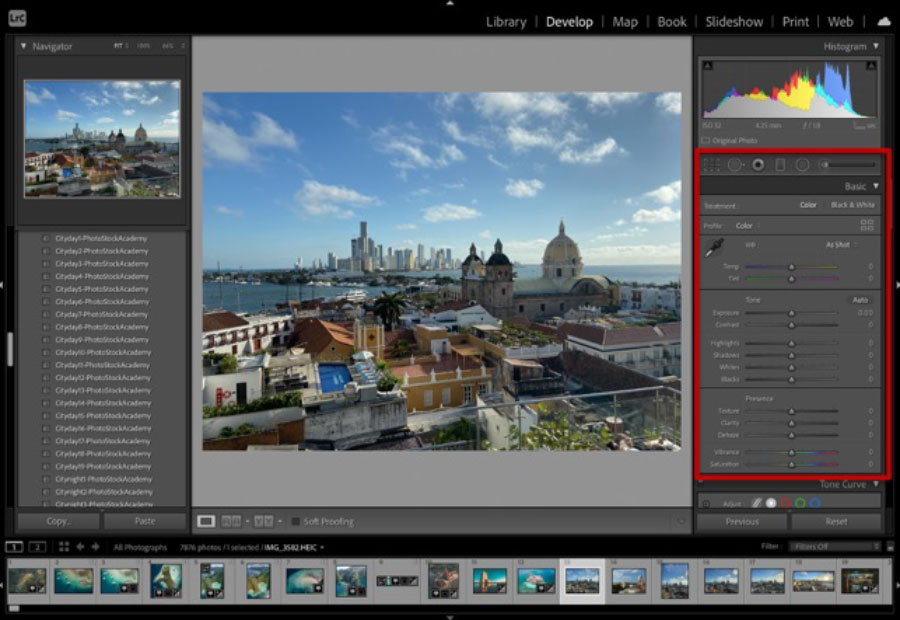
Each photo is different, because of the light and the colours, but there are some basic rules that can be applied for most photos. In my example, I’ll edit a travel photography took with my iphone that I already sold a few times on stock sites.

There are 4 parameters that I always play with for every single photo : Exposure, Highlights, Shadows, and Vibrance.
Exposure is the amount of light that reaches your camera sensor. According to the degree of exposure, we can find 3 types of images: overexposed, underexposed and ‘correctly’ exposed. Here make sure your image is neither too dark or too bright.
Highlights are the lightest elements in an image, whereas Shadows are the darkest areas.
Here I always move the highlights between -100 to -70 and I move the shadows between + 50 to +100 depending on the photo. It allows me to have more details in the bright and dark areas, then I can adjust the white and blacks.
The Vibrance slider adds saturation to a photo, but it does it in a smarter way than the Saturation slider. I usually always add between +20 to +35 vibrance to all my photos to have more vivid colours.

The photo is ready to be sold !
I usually don’t spend more than a few minutes to edit an image, and then I use copy/paste and presets to automate the process for all other images. That I will explain it in another stock photo tip tomorrow in a next tip.
I hope you enjoyed this quick tip?
If you’d like to know more about Lightroom and how to edit any photo to be approved for stock agencies, there are full detailed modules in the Photostock Academy training.
Stay tuned
As always, if you have any questions, let me know.


Leave A Comment